
Navigating to the Contacts Page
 When you log into Hatch, by default you will be on a Salesboard to which you are assigned. On the left-hand side of the screen (to the right of the workspace tiles), you will see a navigation bar that allows you to go to other pages.
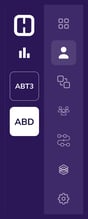
In order to get to the Contacts page, click the person icon ![]() . It is the second-highest icon in the navigation bar.
. It is the second-highest icon in the navigation bar.
The Full Contacts Page
Below is the entire contacts page and in the sections below we will cover a series of sections in depth.
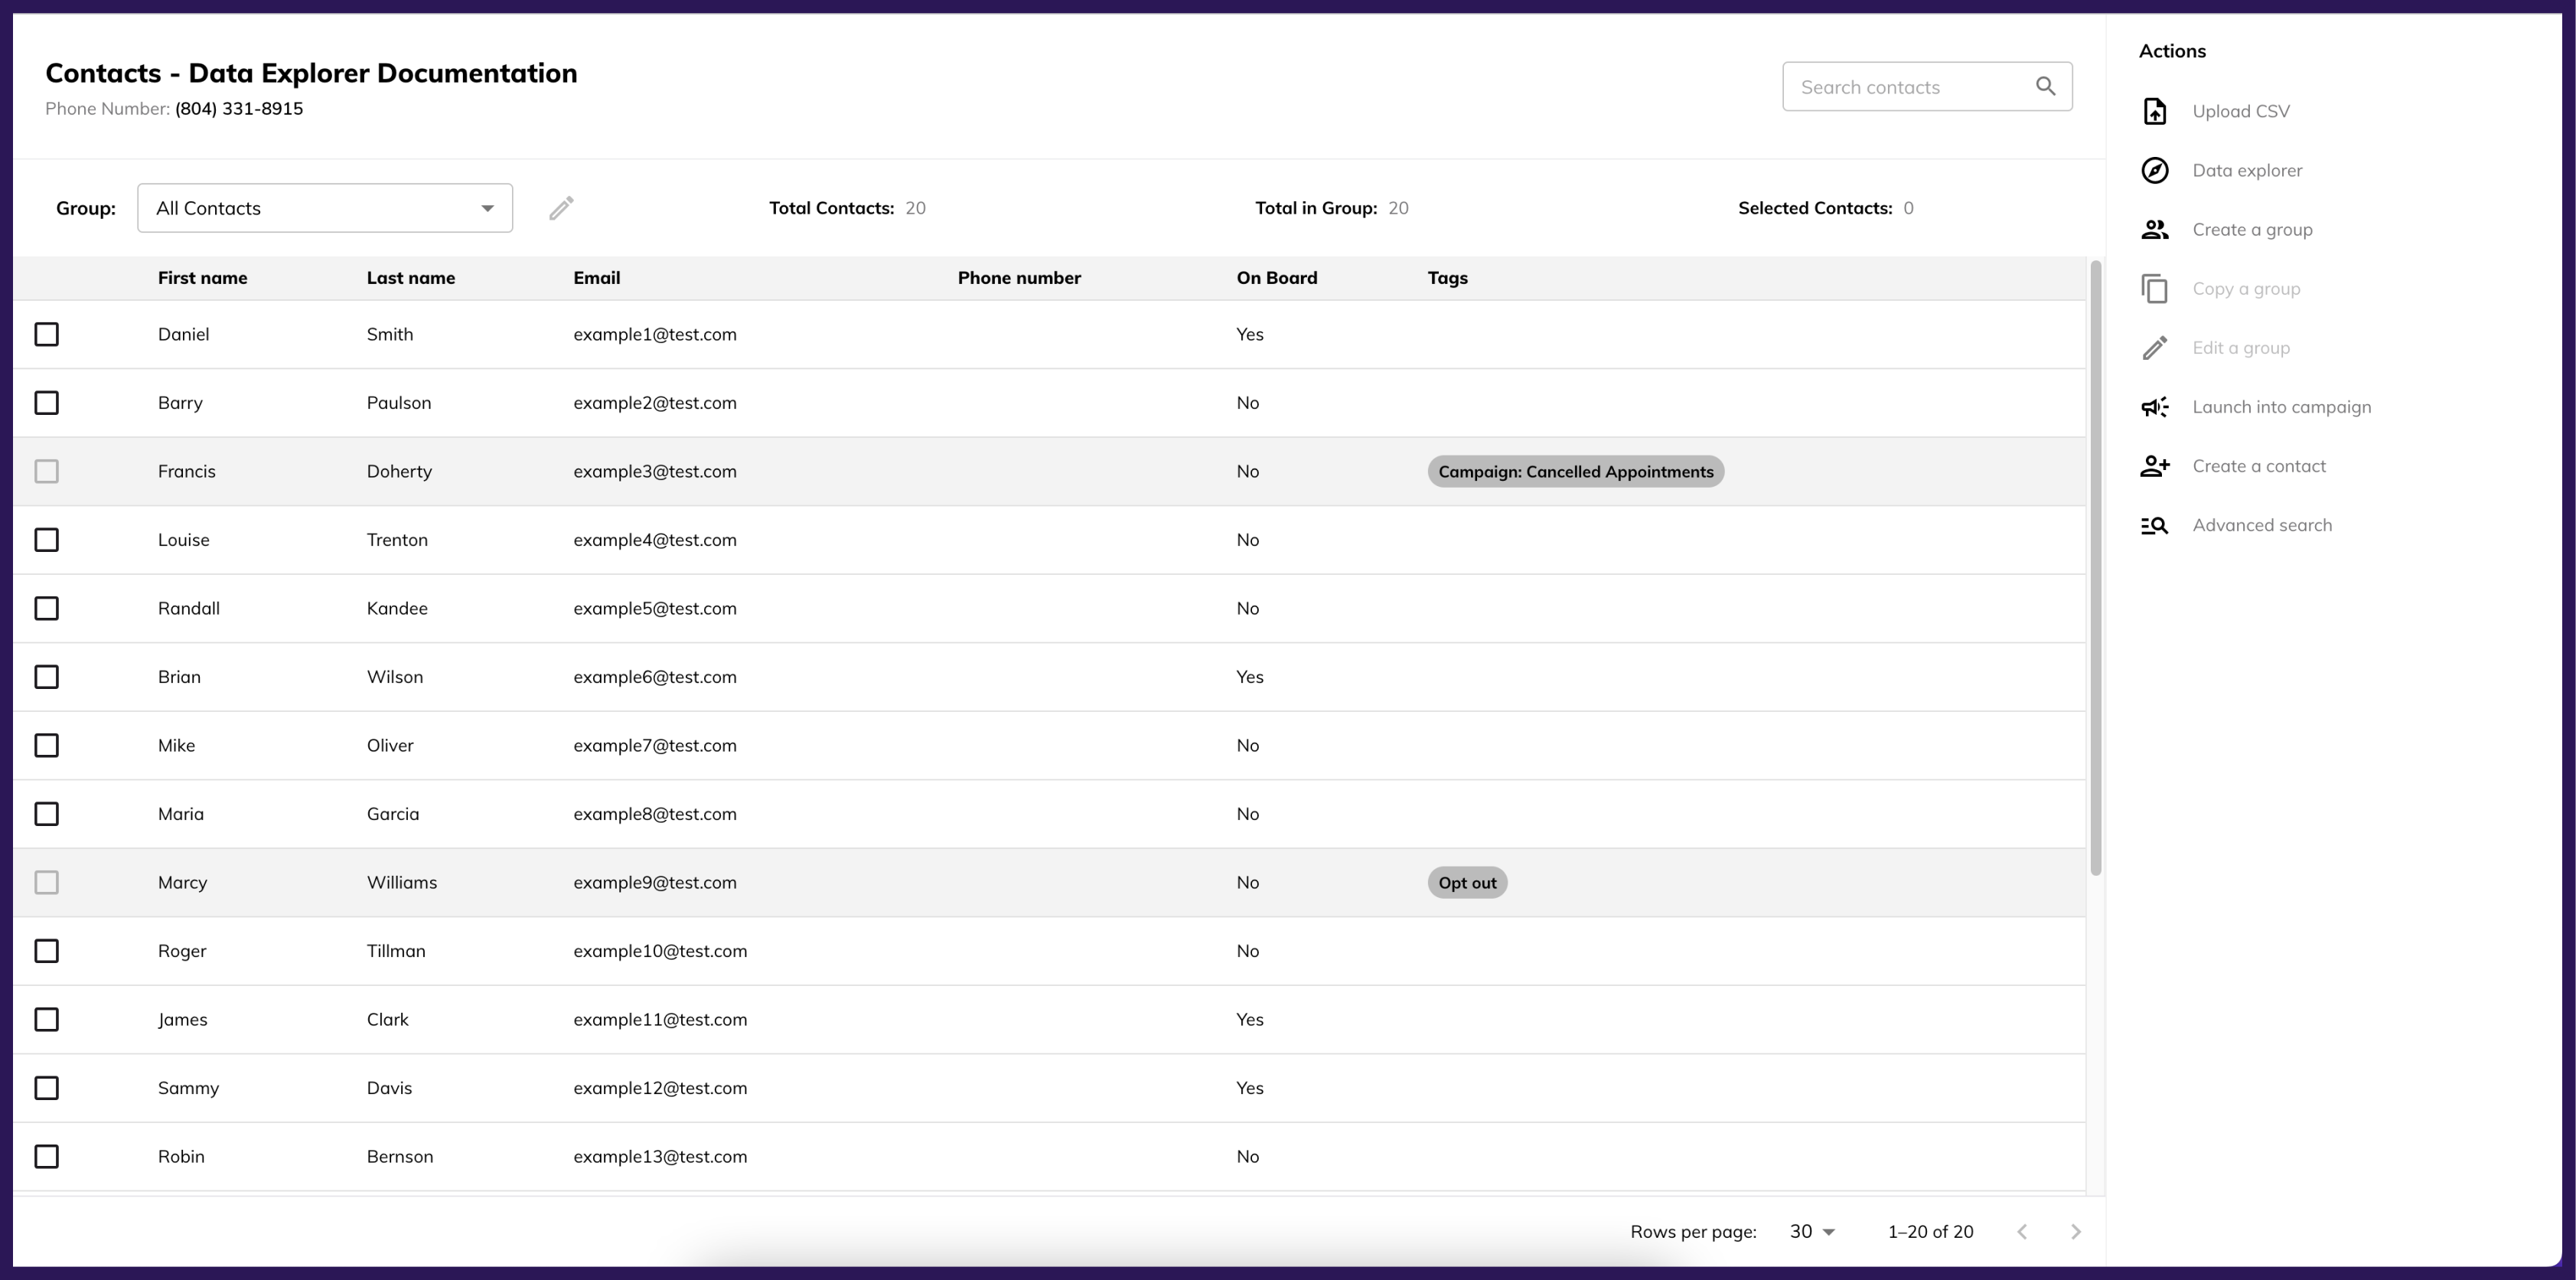
Header Section

- A: Simple Search
- Entering a search term here and either hitting Enter or clicking the magnifying glass will return a list of contacts that include the search term in the First Name, Last Name, Phone, or Email fields.
- B: Groups Drop-down
- This is a list of all groups that exist on the workspace.
- The default is “All Contacts”.
- If a group is selected, the contacts list will filter to contacts that currently fit that group.
- A group must be selected to enable the Edit a Group or Copy a Group features.
- C: Edit a Group shortcut
- Clicking this will open a query editor that is populated with the selected group’s criteria.
- D: Total Contacts
- This is a count of all the contacts that exist in the current workspace.
- E: Total in Group
- This is a count of all the contacts that fit the criteria of the selected group.
- If no group is selected, this will be 0.
- This is a count of all the contacts that fit the criteria of the selected group.
- F: Selected Contacts
- This is a count of all the contacts that are currently selected (the checkbox by their name is ticked).
Actions Section
This menu is on the right-side of the Contacts page. This area of the screen is also where the query editor lives when opened.
- A: Upload CSV
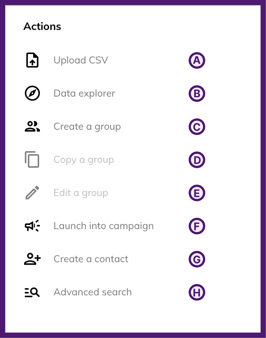 Clicking this button will lead to an option to download a CSV template or upload an existing CSV to add contacts to Hatch manually
- B: Data Explorer
- Clicking this will open the Data Explorer.
- C: Create a Group
- Clicking this will open a blank query editor box where you can input HQL and save a group with a name.
- D: Copy a Group
- Once a group is selected, this option will be available and you will be able to copy the query of the selected group.
- E: Edit a Group
- Once a group is selected, this option will be available and you will be able to edit the query of the selected group.
- F: Launch into Campaign
- When this is clicked, you will be able to select a campaign from that workspace and a preview of the messaging will show up.
- When contacts are selected, you will then be able to manually kick off the selected campaign for the selected contacts.
- G: Create a Contact
- Clicking this opens a form to input
- First Name
- Last Name
- Phone Number
- Email Address
- Clicking save will create a new contact or will add an opportunity to an existing contact if that phone number or email is already associated with a contact.
- Clicking this opens a form to input
- H: Advanced Search
- This is a blank query editor that does not allow a save but does allow for one-off HQL searches.
Contacts Table Section
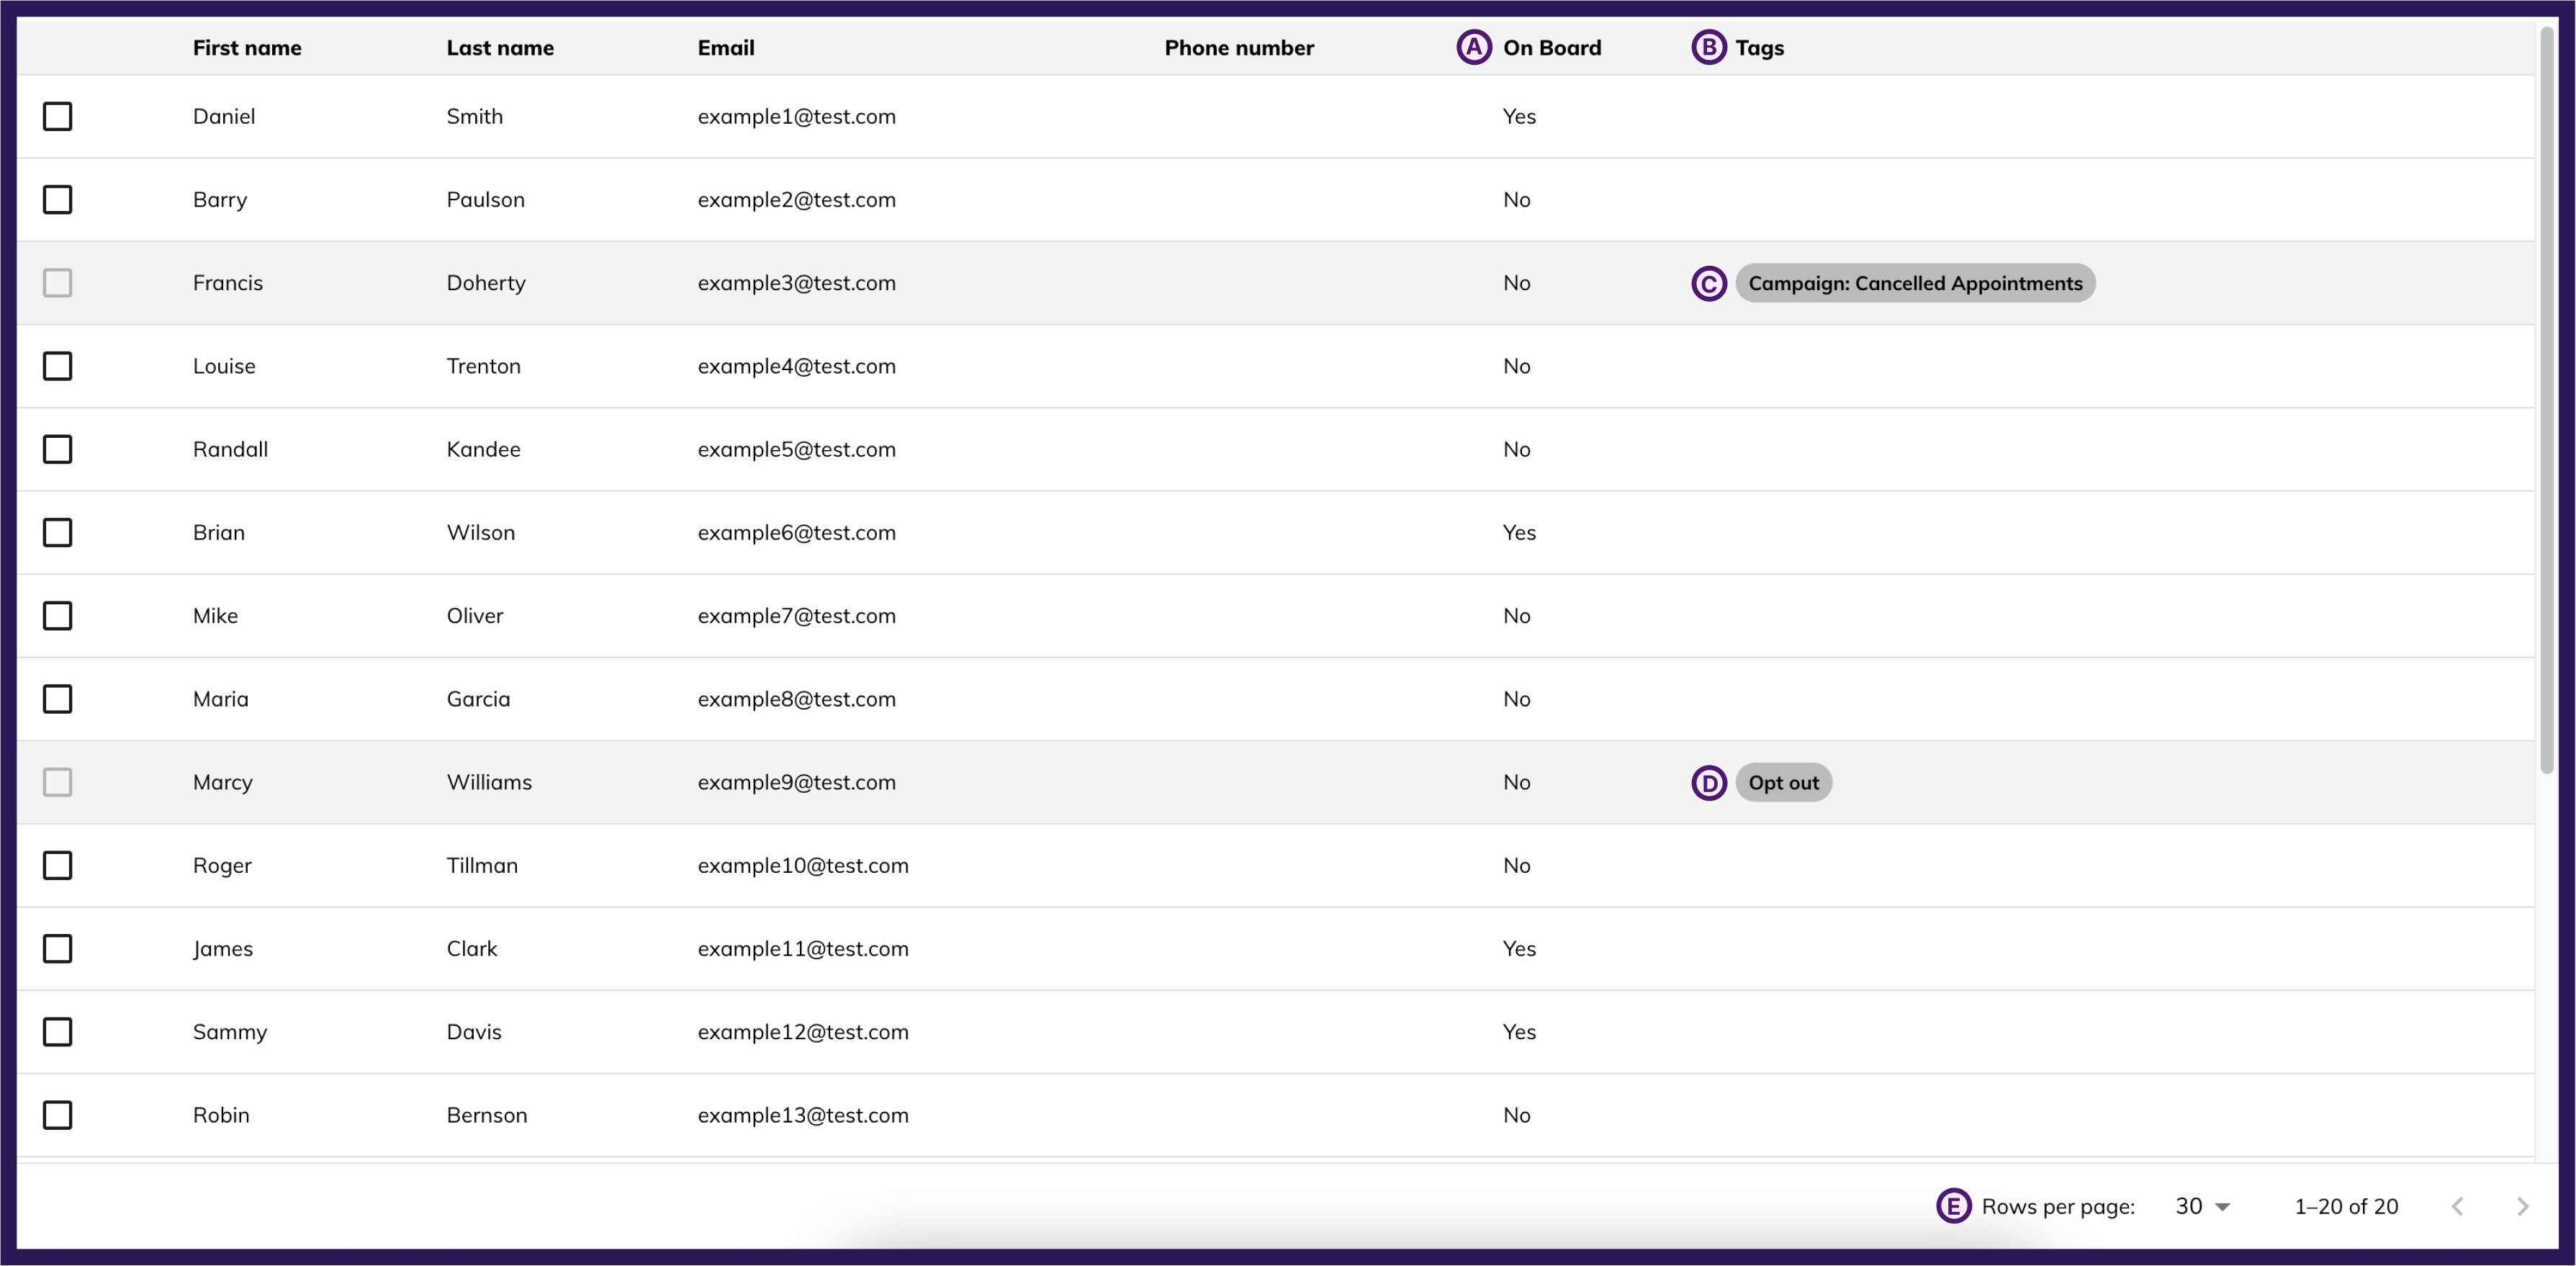
- A: On Board
- This column lets you know if the contact is on the current workspace or not
- B: Tags
- The only two tags are related to Hatch events
- If the contact is currently in a campaign (C)
- If the contact has been opted out in Hatch (D)
- The only two tags are related to Hatch events
-
- If a contact has either of these tags, that contact cannot be selected to launch into a campaign
- C: Campaign Tag
- This tag displays the name of the campaign the contact is currently in
- D: Opt Out
- This tag only applies when the contact was opted out in Hatch
- E: Rows Per Page
- This allows you to choose the amount of contacts that appear per page to scroll through
- The count next to this is which range within the contacts the current page is on