
Creating a campaign is easy with campaign templates. We'll walk through how to make a campaign from start to finish.
Step by Step

Step 1 - Navigate to the Campaigns Page
Hit the campaigns tab to see all the campaigns associated with your workspace. On the campaigns page, you can edit your messaging cadence, rename, delete or duplicate your campaigns, and see how many contacts are active in a campaign.
To create a new campaign, click 'create campaign'.
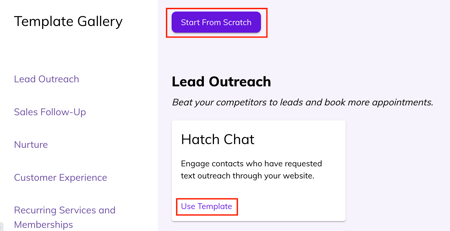
Step 2 - Create Campaign
From the campaign templates, you can decide if you want to build a campaign from scratch or use one of the templates provided, aligned with Hatch marketing best practices, across a range of use cases.
Step 3 - Write yo ur verbiage and pick your cadence
If you are using a campaign template, take a look through all the messages to ensure they're aligned with your marketing needs. Snippets make sure that every campaign will adapt to the information you have in Hatch—[[Details Company Name]] will say your company name for the end user!
If you're starting from scratch, you'll need to determine what types of messages need to go out (and when). We recommend multiple touch points across text, email, and calls on different days, but it all depends on the type of campaign you'd like to run.
Step 4 - Adjust message send times
Text, emails, and voicemail drops can be sent at any time you like.
If you choose 'Launch' for send time, contacts will start receiving messages as soon as they meet the criteria for an audience in an active workflow. For example, if an at-launch campaign is paired in a workflow with an audience tied to lead source like Angi, as soon as Hatch receives the new contact information from Angi, the first message will go out.
If you choose a specific send time, the message will go out the when that time rolls around again. If contact information comes in from at Angi at 3pm today, but the first message in the campaign isn't until 9am, the first message will send at 9am tomorrow.
Step 5 - Adjust Details + Create Campaign
Choose if you would like this campaign to send messages on the weekend or on holidays. Holidays currently include Thanksgiving Day, Christmas Eve, Christmas Day, New Years Eve, New Years Day.
For an at-launch campaign, you can also select separate messages to go out outside of your workspace's business hours. If you'd like to notify a contact that you've received their information, and plan to send them a message in the morning, you simply toggle the 'after business hours response'.
 Once you have reviewed your changes and made any adjustments, click Create Campaign. If you ever want to make additional edits to the campaign, simply click back into the campaign from the Campaigns page.
Note: any contacts that are actively in campaign when changes are made will receive the campaign messages that were set before the changes were made. Any contacts that are put into campaign after changes were made will receive the new messages.